
AN ACTIVITY WITH AN EXPANDING LISTVIEW
Creating a Simple ListView
If you have an activity that will only contain a single ListView control, you can derive your activity from the ListActivity instead of Activity. However, I think I might like to show some extra info below my ListView so I chose to have a separate ListView object. My activity layout (main.xml) looks like this:
<LinearLayout xmlns:android="http://schemas.android.com/apk/res/android"
android:layout_width="fill_parent"
android:layout_height="fill_parent"
android:orientation="vertical">
<ListView android:id="@+id/ listview "
android:layout_width="fill_parent"
android:layout_height="wrap_content"
android:layout_weight="1" />
</LinearLayout>
And I need the layout for items in the ListView (listitem.xml):
<?xml version="1.0" encoding="utf-8"?>
<TextView xmlns:android="http://schemas.android.com/apk/res/android"
android:layout_width="fill_parent"
android:layout_height="wrap_content"
android:textSize="24dip"
android:padding="8dip"/>
Note a nice trick that I’ve used to get the TextView to “dock” at the bottom with a definied height, and have the ListView automatically fill out the rest of the height. This kind of thinking is important since Android devices can have different resolutions. The trick is to set the layout_height to zero pixels and the layout_weight to one (default is zero). Not sure about the logic behind that, but it works!
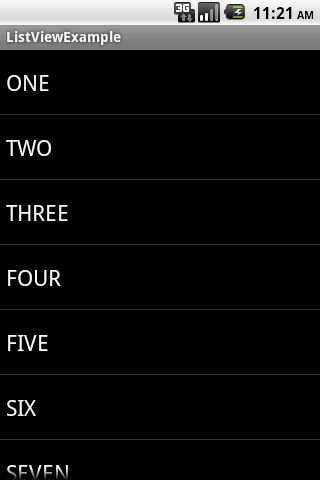
In order to have something to put into my ListView, I created a string array and I added to the ListView with the ArrayAdapter object.
public class ListViewExample extends Activity
{
private ListView lv;
private String listview_array[] = { "ONE", "TWO", "THREE", "FOUR", "FIVE", "SIX",
"SEVEN", "EIGHT", "NINE", "TEN" };
public void onCreate(Bundle icicle)
{
super.onCreate(icicle);setContentView(R.layout.main);
lv = (ListView) findViewById(R.id.listview);
lv.setAdapter(new ArrayAdapter<String>(this,
android.R.layout.simple_list_item_1, listview_array));
}
}
Creating a ContextMenu in Android
When the user long-clicks, the event onCreateContextMenu is fired for the control that the user is clicking. For me, that is the ListView control. But since I don’t want to write a custom ListView-derived class, I want to catch that event in my activity. There does not seem to be any bubbling going on. Events fired in a child control does not bubble up to the parent if they are unhandled.
But obviously, the api designers have thought of this since there is a special method for this situation. Call the registerForContextMenu in your activity for this! This will actually make sure your overridden methods for both onCreateContextMenu and onContextItemSelected is called for the ListView-events as we’ll see soon.
Next, we’ll provide the implementation of onCreateContextMenu. Here I want to ensure that the event comes from the ListView and if so, I want to determine on which item in the ListView the user long-clicked.
public void onCreateContextMenu(ContextMenu menu, View v, ContextMenuInfo menuInfo)
{
if (v.getId()==R.id.listview)
{
AdapterView.AdapterContextMenuInfo info = (AdapterView.AdapterContextMenuInfo) menuInfo;
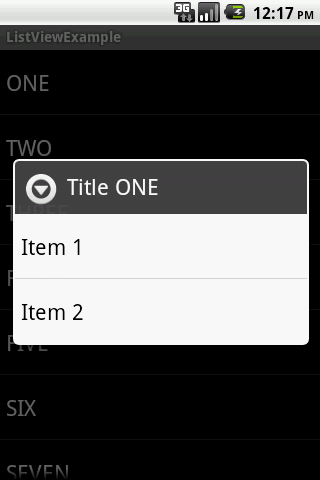
menu.setHeaderTitle("Title " +listview_array[info.position]);
//menu.add(groupId, itemId, order, title)
menu.add(Menu.NONE, 0, 0, "Item 1");
menu.add(Menu.NONE, 1, 1, "Item 2");
}
}
As you can see, the argument of type ContextMenuInfo can actually change depending on what type of control is sending the event. For ListViews, the class you need to type cast into is AdapterView.AdapterContextMenuInfo. From there I used the position, which in my case corresponds to the index into the string-array. From the array I retrieve the string for that particular item and use as title for the menu. Then you can of course add all the menu commands you like.
When creating the menu items with the add-call, I specify that I don’t want any grouping of the items (Menu.NONE) and that the order and id of the item is the same. The last argument to add is the text to display for the item.
Responding to selected MenuItem
If the user dismisses the context menu (for instance, by back button) you don’t need to do anything. But for catching the actual selection of one of the items, you need to override onContextItemSelected.
{
AdapterView.AdapterContextMenuInfo info = (AdapterView.AdapterContextMenuInfo) item.getMenuInfo();
int menuItemIndex = item.getItemId();
String[] menuItems = {"Option 1", "Option 2"};
String menuItemName = menuItems[menuItemIndex];
String listItemName = listview_array[info.position];
Toast t = Toast.makeText(this, String.format("Selected %s for item %s", menuItemName, listItemName), Toast.LENGTH_LONG);
t.show();
return true;
}
The MenuItem argument holds all information that you need. The ContextMenuInfo object that got sent to onCreateContextMenu is still there and still needs type casting. Or I guess you could have saved that info in the activity between the calls, but I didn’t.
The id of the menu item selected is the same as the index into the string array of menu item texts for me. Instead of just outputting the menu command name and the list item text in a Toast, you would most likely have a big switch statement on menuItemIndex.

Thank you!
Have a great day!
Have a great day!


Wow.. Very useful post..
ReplyDeleteyou're using
ReplyDeletelv.setAdapter(new ArrayAdapter(this, android.R.layout.simple_list_item_1, listview_array));
or
lv.setAdapter(new ArrayAdapter(this, android.R.layout.listitem, listview_array));
for ListView
You can not use [android.R.layout.listitem] since android doesn't have a predefined layout named listitem.
ReplyDeletelistitem is a custom layout, we can use in layout in our customadapter.
document of ListView control
ReplyDeleteIt's interesting that many of the bloggers your tips helped to clarify a few things for me as well as giving... very specific nice content.Android Training institute in chennai with placement | Android Training in chennai |
ReplyDelete